Setting up a Virtual Private Server (VPS) can seem daunting, but with the right guidance, it’s an achievable task. This comprehensive guide will walk you through the essential steps to configure your VPS from scratch, ensuring optimal performance and security.
What Is a VPS?
A Virtual Private Server (VPS) is a virtualized server that mimics a dedicated server within a shared hosting environment. It offers greater control and customization compared to shared hosting, making it ideal for websites, applications, and services that require dedicated resources.
Step-by-Step VPS Setup
A. Choose a VPS Hosting Provider
Selecting a reliable VPS provider is crucial. Consider factors such as uptime guarantees, customer support, scalability, and pricing.
B. Access Your VPS via SSH
Secure Shell (SSH) is a protocol that allows secure remote login to your VPS. For Unix-based systems, use the terminal; for Windows, tools like PuTTY are recommended. Connect using the command:
ssh root@your_server_ip
Replace your_server_ip with your VPS’s IP address.
C. Update Your Server
Keeping your server updated ensures security and stability. For Debian-based systems:
apt update && apt upgrade
For CentOS-based systems:
dnf update
D. Create a New User
Operating as the root user can be risky. Create a new user with administrative privileges:
adduser newuser

usermod -aG sudo newuser
Replace newuser with your desired username.
E. Configure SSH Key Authentication
Enhance security by setting up SSH key authentication:
Generate SSH keys on your local machine:
bashssh-keygen
Copy the public key to your VPS:
bashssh-copy-id newuser@your_server_ip
This method reduces reliance on password-based logins.
F. Set Up a Firewall
Implementing a firewall adds an extra layer of security. For Ubuntu systems, UFW (Uncomplicated Firewall) is user-friendly:
ufw allow OpenSSH

ufw enable
Ensure only necessary ports are open to minimize vulnerabilities.
G. Install a Web Server
Depending on your needs, install a web server like Apache or Nginx. For Apache:
apt install apache2
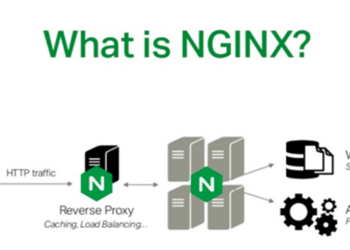
For Nginx:
apt install nginx
Configure your web server to serve your website or application.
H. Secure Your Server with SSL
SSL certificates encrypt data between your server and clients. Use Let’s Encrypt for free SSL certificates:
apt install certbot python3-certbot-nginx

certbot --nginx
Follow the prompts to secure your domain.
I. Monitor and Maintain Your VPS
Regular monitoring ensures your VPS runs smoothly. Implement tools like htop for resource monitoring and set up regular backups to prevent data loss.
Hosting a Website on Your VPS
Once your VPS is configured, you can host your website:
Upload your website files to the web server’s root directory.
Configure your domain’s DNS settings to point to your VPS’s IP address.
Ensure your web server is correctly serving your website.
Conclusion
Setting up a VPS provides greater control, security, and scalability for your online projects. By following this guide, you can confidently configure your VPS to meet your specific needs.